Here is the story of "Phase 1" of my plane-building project, and includes all my blog entries (and pictures!) from the first 10 months of building. This project was started in October 2006.
Biding my time, October 30, 2006
Waiting for the plans to come, I went online and found some free plans for the GyroBee, an ultralight gyroplane designed by Ralph Taggart. I've printed them out, and am trying to get a feel for how airplane plans are written, and what some of the building issues may be.
Also need to clean up the garage, and maybe start working on a sheet and angle metal stand.
Ordered some metal, November 8, 2006
I found a local supplier for 6061 T6 aluminum. This is a big deal, and should save me a lot of time and money. I've ordered most of the smaller dimensioned sheet metal of various thicknesses, which I should be able to transport in the Jetta. From this I think I'll be able to make most of the "connecting" pieces for the airframe--gussets 'n things.
The supplier doesn't list the .025" thickness aluminum sheet on their website, so I may have to look elsewhere for that. Hopefully I can find it locally, since I need 11 huge sheets of it (assuming I don't mess any of the parts up that come from them). I'll ask about the .025" when I pick up my first order.
Theoretically this means I'll be starting the build this week!
--Bill
The Mission - November 8, 2006
When you ask a homebuilding old-timer what kind of plane you should build, they will probably shoot back with, "What's the mission?" Since no airplane can be all things to all people, you have to decide what kind of flying you'll do most of the time, or decide which kind of flying is the most important to you, and build to that "mission". So what did I decide was important? And what will I be giving up to fulfill the mission I've decided on?
My priorities, in descending order:
1. I want to get better at flying, first of all. So I want to have the option of flying a lot. --Most planes are still in the running
2. Want to be able to carry at least one passenger.
3. I'm not willing to shell out more than $30,000 total to acquire or build the plane. --Still lots to choose from.
4. I want good gas "mileage" (in airplanes, this is measured by gallons per hour, or gph). For me this means 5 gallons per hour or fewer. --At this point, you're looking at at mostly kit-built or scratch-built airplanes and ultralights.
5. I want to be able to travel cross country on occasion, with a passenger, and travel at over 100mph. But the plane should also be able to fly at relatively low speeds. I shouldn't have to land at 70mph. 50mph would be better. --At this point, one of the coolest homebuilt contenders drops off--the CH701, which has incredible short-field takeoff and landing capabilities, but doesn't travel especially fast.
Things that would be nice, but would encroach on other priorities:
1. Flying in clouds (instrument flight rules or IFR). Making an aircraft suitable for IFR could at a lot of expense to the project. Plus cross country travel is not of the highest priority. One of the benefits of flying IFR is that you aren't as likely to have to cancel your flying plans if the weather is marginal. With my mission, flying on a set schedule can't be a priority.
2. Carrying more than one passenger in addition to the pilot. Basically you need more power to carry more people. More power means more gas, and I don't want to burn a lot of gas. Plus a higher powered engine adds more cost to the aircraft.
3. Night flying. This one I'm sort of on the fence with. With the Sonex, it's possible to add the required lighting and such for night flight. This adds weight to the airplane, plus cost. On the other hand, the option to fly at night would be nice. It's a low priority--we'll see.
4. Speaking of extra passengers, no bringing the dogs along. This was a toughie. This issue was actually something that made me face really defining my mission. Having the space and the power to carry our three dogs with us basically would have meant bumping cross-country flight to the highest priority, upping my cost ceiling, and burning more gas on every flight even if I'm the only one in the plane (which adds to the ongoing cost). The increased cost of the project would put my completion date out further in the future as well. Bringing the dogs along would have eaten so much into my other priorities, that I had to give it up as an option.
Other considerations: lots of homebuilt planes are built out of fiberglass, and lots are built out of wood, and lots are built out of steel. Wood and fiberglass work are sensitive to temperature and humidity issues. I live in Minnesota--if I'm going to be building in my garage (which I am), fiberglass is out (for me--it's not as if nobody builds with fiberglass around here), and I'm a little reluctant to go with wood. Steel means welding, which I don't feel ready to tackle. The (mostly) aluminum construction of the Sonex, fits the climate and my skills comfort zone.
So this isn't going to be a business plane, and it's not going to be a "family trip" plane, though Krista and I should be able to use it for travel on occasion. It will be for fun, skill development, and education (I should learn a lot by building it). That's my "mission", old-timer.
--Bill
Have metal, will mangle - November 14, 2006
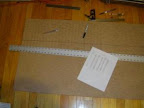
Now that I have some metal (picked it up last Saturday), I decided to try my hand at a little part-making. To start off easy, I picked a part that was drawn to full-size in the plans (and therefore traceable), and was relatively simple (a 2" x 2" square of sheet metal). It took me a little less than 1/2 hour to create a roughly trapezoidal piece. Don't think that one will go on the plane.
I was actually thinking about cutting out one of the larger formers, but when I looked at the plans I became confused: I know the formers have flanges, but I didn't see them on the plans. I think the plans explain something about the flanges, but I don't totaly understand it...
...Back on the computer, I did some searches on the Sonexbuilders yahoo group, and found a conversation in which Kerry (at Sonex) suggested a web address for an online blueprint-reading tutorial. I'm working my way through that now. For those who are interested, the address is: http://www.tpub.com/content/draftsman/14040/
The yahoo groups can be a little frustrating. There are 16,000+ messages, starting chronologically in the late 90's. There seems to be a lot of good information in there, but you have to dig, since it's only grouped by conversation thread, and most threads run less than 10 messages. I'm pulling out nuggets as I come across them, and saving them as Word documents. I then group the documents by folder on my computer ("Canopy", "Metal cutting", etc.)
Tomorrow I'll spend some more quality time with the plans and see if that blueprint tutorial has sunk in. --Bill
Are you experienced? - December 3rd, 2006
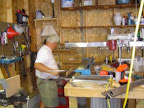
Tonight I made 40 metal rectangles! I got some quality time with the bandsaw, the scotchbrite wheel, and some podcasts (hooray for podcasts!)
It's freaking cold outside, and the garage doesn't want to stay warm. I've done some very rudimentary cordoning off of the section I'm working in (plastic dividing the garage, and various things over the rafters to keep the heat from escaping too fast.) The cold still prevails, but I bundle up, and it works out ok.
It was great getting more experienced with the bandsaw, and the part-making process. I would recommend doing these parts early in the process for anyone else making the Sonex (if I have the credibility to recommend anything at this point)--the parts aren't complicated, there's lots of them, and they involve three basic processes that you'll be doing a lot--cutting, deburring and polishing. No bending or drilling for these, but that's probably a good thing. You blast them out in a few hours. (For reference, the parts are W14-02 and W14-03 in the plans--they're spacers that go between wing rib pieces.)
I put tonight's parts in labeled ziploc bags, for preservation and identification (mostly for the latter). I think this will work well for all of these small parts.
The bandsaw is worth it's weight in gold.
More metal on the way - December 6, 2006
I finally found a local source for 6061-T6 in the .025" thickness. Erickson Metals. ( http://www.ericksonmetals.com/ )
They were less expensive than Wick's, and will deliver for $25! I probably saved $400 on this order by going local.
So tonight I had to make way for a shipment of eleven 4'x12' sheets of aluminum. I did "phase 2" of the garage reorganization, and built a storage rack for the aluminum sheet. The outside air temperature was in the high 20's tonight, so it was very comfortable in the garage (unlike the last week or so).
I now probably have enough metal to keep me busy through the winter (easily). Once this metal is cut out, bent, drilled, etc., I'll move on to the angle aluminum pieces. Then assembly will begin. It sounds so simple, and will take so long!
So long! - Bill
Get to work! plus Why podcasts are cool - December 10, 2006
My friends Nate and Jon helped me unload a pallet of .025" thick aluminum on Thursday. I was pleasantly surprised that Erickson Metals had taken pains to package the sheets with individual sheets of paper in between each sheet, and wrapped the whole thing in butcher paper. Added bonus: the pallet is 12' long and 4' wide, and sturdy as heck! I've found my "Sonex Workbench".
The weather has turned nice again, so I'll be spending more time in the garage.
I like to have background drone when I'm doing something that takes more than 15 minutes--it helps me get to that "flow" state of mind. When baseball season comes around again, I think that will be my drone of choice: listening to games on the radio. These days I'm listening to classical music when I'm doing stuff that requires some thinking (making measurements, figuring stuff out), and podcasts when I'm doing more tactile stuff (cutting things out, deburring, etc.) Podcasts are great, but they haven't caught on in as huge a way as I think they eventually will. Probably part of the reason, is that there are a ton of them out there, and it can be hard to find the "best" ones. Another reason is that downloading podcasts pretty much requires a broadband connection and an mp3 player. Also, the technology of subscribing to a podcast feed is outside of a lot of people's computer knowledge comfort zone.
In any case, podcasts are cool, and a great way to help pass the time while doing mundane tasks. Here are some sites and individual podcasts and "podiobooks" (audiobooks, released serially as individual podcasts) that I like. NOTE: Some of these are a bit more "Rated R" in content, and may not be suitable for younger listeners, or those who are bugged by vulgar language and adult situations. I'll try to identify these as such.
www.podiobooks.com - Free audiobooks in podcast form
- Ancestor by Scott Sigler (Rated R)
- The Failed Cities Monologues by Matt Wallace (Rated R)
- Earthcore by Scott Sigler (Rated R)
- 7th Son by J.C. Hutchins (Rated R)
- How to Succeed in Evil by Patrick McLean (R)
Other podcasts (can be found at places like itunes.com or podcastpickle.com:
- The Onion Radio News (Rated R)
- On the Media (G, usually) - NPR's weekly program examining, interviewing, and commenting on the media
- The Engines of Our Ingenuity (Rated G) - excellent 4 minute podcast about innovation and invention
- The Sci Phi Show (Rated G) - talking about philosophy using science fiction as a jumping off point
- The SCOTUSblog podcast - (G) - podcast about the supreme court
- Airspeed - (G) - podcast about flying (airplanes, ultralights, baloons, etc.) and the flying community
- The Dawn and Drew Show - (Very Rated R) - While the content of the DND Show often runs to the "blue", it is the good-naturedness of its hosts that keeps me listening. Highly recommended if language doesn't bother you.
- Intellectual Icebergs - (PG-13) - I really like this podcast about things that are important to geeks. They distinguish themselves from many podcasts by doing a lot of preparation and research for each show, so most segments are very in-depth.
- DailySonic - (R) - This was a great, 3-times-a-week podcast that burned its creators out, and now it's gone. There's probably episodes available online, though.
- Destructomundo! - (R) It sounds morbid, but it's fun to listen to these guys sit around and talk about different end-of-the-world scenarios (zombies, asteroids, last man on earth, supervillains, science run amok), and what one might to to survive. Plus their website has an Atari 2600 visual theme.
Now, off to the garage!
-Bill
Christmas break, bending brake
Didn't get much done the last week or so, with family stuff, work, and the necessary holiday naps. I got some neat stuff for Christmas that will help me on my plane-making journey. I'll post pictures as soon as I've taken them. Dad and Mom got me a reciprocating saw, which has already come in handy, with it's metal-cutting blade--it will also be very welcome on home-improvement stuff. Krista's parents got me a very generous Home Depot gift certificate, which I *may* be able to find a use for :-), and Wendy and David got me a rolling workshop stool, which puts a nice finishing touch on my workshop, and will provide welcome relief on long deburring sessions.
Tonight, before going out to work on actual cutting out of stuff, I leafed through the plans while Krista and I listened to "Wait Wait...Don't Tell Me!" on NPR (actually over the internet). I put post-it notes on all the small gusset-type pieces I have yet to cut out, and tagged those pages with post-it notes scraps.
Early last week I received the bending brake I ordered from Harbor Freight. It's a 40" brake, which can bend up to 16 gauge steel (and most of the aluminum pieces I need to bend). I had been considering 1) building my own brake, 2) buying the pre-formed aluminum kit from Sonex, or 3) waiting for altruistic elves to bend the parts for me while I sleep. I priced the materials for building my own brake (there are a few free plans on the internet for this), but the 40" brake from Harbor Freight cost less than the materials to make the homemade one. Plus they shipped it for 9.99 (it's over 100 lbs). Whattabargain! I've been practicing on it with scrap and am understanding a little better how the bending brakes work, and also why this one only bends up to 16 gauge.
This next part is what I now understand about bending brakes. If you are knowledgeable about bending brakes, or easily bored, you may want to skip it.
--What I know about bending brakes now--
The bending brake has basically three parts: 1) a flat surface across which the piece to be bent rests; 2) a flat, hinged surface, across which part of the work piece also rests--this surface starts flush to the first surface, and is hinged to it; 3) a "top" piece, which holds the work piece in place on piece 1. In the simplest terms, you clamp the workpiece in place over parts 1 and 2, then move part 2 on its hinge, which bends the work piece. This part I understood--what I didn't understand was how you achieve a particular "radius" on your bend. The radius of a bend is important, especially radii which are too-sharp.
When you bend a piece of metal the metal stretches on the outside of the bend and "bunches" on the inside of the bend. A bend which is "too sharp" is one which stretches the outside of the metal piece to the point where its strength is significantly compromised. This depends on the particular alloy you're using (there are tables that tell you--but your airplane plans will probably have that info for the pieces you're making, too.)
To set a radius on a bending brake, you set back the "top" piece (piece 3 mentioned above, which clamps the workpiece in place) by around 1/2 (2/3's? I'll find out and revise this) of the desired radius. Metal that's thin enough will bend out beyond the top piece, closer to the seam between part 1 and part 2, and you get a nice radius.
Thicker metal tends to want to bend right at the top piece, or very close to it, producing a too-sharp bend if going beyond 45 degrees or so.
I think the reason for this is that the thinner metal has more "give" to it per inch (I don't know how one measures "give," but there you go.) The top, clamping piece gives the work piece a little more stiffness near to where it's clamped, so it tends to bend a tiny bit farther out, so the bend isn't overly sharp. I think the key is that the lever (part 2) has to be far enough away from the clamping spot to allow the work piece to bow between the place where the leverage is applied, and the clamping spot. With thinner metal this distance is fractions of an inch. Thicker material (say, .090" aluminum) would need more like fractions of a foot to allow bowing. Since the bending brake isn't large enough to accommodate that distance, the workpiece simply bends at the first place it can, which is at the clamping point.
If the edge of the clamping point had large-radius edge (say 1/2" for .090" thick material--this is a guess), you'd still be ok. The material would follow around the edge when the leverage was applied. But the bending brake edge has maybe a 1/16" radius, so no go on the thicker material.
On the Sonex, the most of the thicker angled pieces start with a piece of extruded 90 degree angle, rather than taking a thick piece of metal and bending it to 90 degrees. The thick pieces that do get bent by the builder are usually bent at far fewer than 90 degrees. And most of the pieces that do get bent are of the much thinner .025" aluminum sheet. This means many, if not most, of the bends called for in the plans can be done on my 40" brake. I think.
Bill
The bandsaw blade's gettin' dull
If I go faster than a half a millimeter per second with the bandsaw, it slows down and stops. I'm thinking the blade is getting dull. I've made quite a few parts, and lately I've been cutting the thicker sheet. The end.
Ah ha! Band saw is not dull! January 19, 2007
I fiddled around with the bandsaw tonight, and discovered that it's not dull, but that the drive belt was a little loose. By loosening a couple nuts on the engine mount and moving the engine (and the pulley it's attached to), I was able to re-tighten the belt, and like my uncle Emeril says, Bam! the bandsaw was back in action. I wish I'd figured that out before I cut that really thick metal--it would have gone much faster. But now I can move at a better clip.
Workshop this weekend in Oshkosh - January 30, 2007
My work on the plane has slowed to a crawl. But this weekend my dad and I are driving out to Oshkosh to the Sonex Builder's Workshop. (Shoutout to my dad, who is flying up from Phoenex just to go to this workshop--thanks, Dad!) There should be some good information, a bit of skill building, and some networking with other builders. Right now, the two things that are bugging me about this project are: 1) not quite having wrapped my mind around the various aspects of bending metal; and 2) worrying about how "perfect" my parts are. I don't know if the workshop will resolve these issues, but I think it will help my confidence a little, and allow me to check my work and ideas against those of the Sonex team and other builders. I'm very psyched to attend the workshop. --Bill

Back in action - February 9, 2007
January was a bit of a bust in terms of progress on this project. Got back into it today, though. Last weekend was the Sonex Builders Workshop, which was very helpful in making some mental progress on how to devour this elephant.
The workshop focused on the simplest and cheapest way of making things, but also on the importance of doing things "to spec". I got a sense of where measurements are the most critical (wing spars!) and some good hands on experience with some of the fundamentals of sheet metal work and part assembly.
Scratch builders seemed to be in the minority at the workshop. But when you get down to it, everybody ends up doing a certain amount of layout and fabrication of parts. Luckily, the workshop was inclusive of scratch and kit builders, especially in the hands on sections.
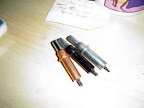
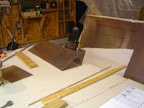
So anyway, I went out and got some 3/4" MDF today, and tonight I started laying out the rib former blocks. I had been heavily leaning toward just buying these from Sonex, but I wanted to do something indoors, and of course it's cheaper to do it myself (as long as I do it right), so there you go. My new space pen is great for layout on the MDF--nice thin lines. 64ths of an inch are a little hard to see, but I think I did pretty well.
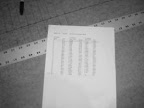
For these "plotted out" parts, I'm taking pictures of parts of the plans with the digital camera, so I can print them out for reference. Also, I'm making Excel spreadsheet versions of the coordinate tables, so I don't have to keep running over to the plans as I lay out the former blocks.
This was a nice diversion from working with the aluminum, and I think the required attention to fine detail will help me when I get back to the metal work. 4 good hours of learnin' tonight. Which brings me to another thing I've been thinking about: Building this plane is like taking a plane-making class. The final exam, I suppose is the first flight. It's very gratifying to be learning skills that go into making something so cool, complex, and fun.
--Bill
Bending practice - February 13, 2007
Tonight I pulled the bending brake out under the light and tried to get a sense of how and where to mark metal so that I get the length I need for each side of a bent piece. I made several "U" channels, marking each one slightly differently, but lining up the marks on the bending brake the same way each time. To avoid confusion I marked the lines with my spaaaaaace pen. (this would be a no-no if I were actually using the parts on the plane--no marking with scratchy objects.)
I used a 1/8" setback on the bending brake (in other words, the "top" piece of the brake that clamps the metal in place is clamped down 1/8" back from the line where the brake hinges) This should give me a 1/8" radius bend (I think?!). I was bending .025" thick aluminum, 90 degree bends.
I found that with two bends (which is what the "U" shape has), the marks should be made 3/32" further in on each side than the called out width for the bottom of the "U". Then place the marks on the hinge line, with the bottom of the "U" on the moving part of the brake.
I think this is why, on the plans, the bottoms of some of the U's come out to weird widths, like 2 29/64". In those cases, I'm guessing, the width of the sides of the U are the key dimensions. Letting the middle come out to something weird probably allows you to start out with a flat piece of non-weird width.
Also, I transfered the dimensions of all the channel and angle stock to a notebook, plus the amounts and lengths of each needed. Much easier to move the notebook around than the plans.
I'm using the practice pieces to set my laptop on, for more efficient cooling when on the desk. Waste not, want not!
-- Bill

A Cleco
The three different colors indicate the different size holes they fit. Silver = 3/32, Black = 5/32, and Copper = 1/8
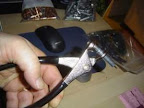
Cleco pliers, used to depress the button that allows the cleco to go through the hole.
The Clecos are here! March 6, 2007
For my birthday, Krista got me clecos, which are very cool devices you don't see every day. A cleco is a spring loaded pin which, when placed in a hole drilled through two or more sheets of metal, and released, clamps the sheets together at the hole, temporarily taking the place of a rivet. Having a bunch of these is critical to keeping your holes lined up as you drill them, while allowing you to take the whole assembly apart after drilling, so the holes can be deburred. They're just the coolest little tools. Thanks, Krista!
--Bill
Melty! - March 7 & 8, 2007 and "I hate daylight savings time"
The massive piles of snow we got the last couple weeks began to melt over the weekend, with the temperatures in the 30's and 40's. I got several hours' worth of work done on plane parts.
The last few pages of the Sonex plans are devoted to "stock": Channel stock, angle stock, etc. These are long pieces that you make yourself out of sheet metal, then cut to length for various purposes (most having something to do with airplane building). I've been trying to puzzle out how to make the stock to the correct dimensions, taking into account the bends that must be made in the metal. I finally decided to dive in this weekend.
Saturday I made all the .025" angle stock (1" x 1" angle), and cut it to length. I also made all of the .032" angle stock (1 1/2" x 1 1/2" angle) and cut it to length. Unfortunately I made the .032" angle stock out of .025" aluminum. Oops. I only swore once.
Sunday, to celebrate my Mom's birthday, I fabricated channel stock from .025" sheet, and cut it to length. I got one entire type done, save for a 77" long piece that's too long for my 40" bending brake. I took a shot at the "hammer" method of bending the flanges for that piece and the results were not pretty. I looked on the Sonex web site, and I can buy the piece from them for $12.50, which is what I'll be doing.
I'm using the "scoring" method of cutting these long straight pieces that become stock. I use an Olfa P800 linoleum cutting knife to score the line. Then I just break the piece off--it's very slick, and the line is very straight.
I hate daylight savings time. I know it's just an hour, but it's messing with my sleep--maybe partly because the dogs do not know about "spring forward" and "fall back". Whatever the reason, it's got me feeling sleepy. So I take a nap when I get home, or early in the evening. Then I can't get to sleep, so I'm up late, then it's hard to get up in the morning and I'm sleepy all day. Then I take a nap when I get home from work, or early in the evening...
--Bill
Wake up! - May 22, 2007
Faithful readers of this site have no doubt been catching up on their sleep the last two months or so. Well, it's time to wake up! Spurred into action by a fellow Sonex builder who happened to stop by the site, I'm back in action.
I haven't been entirely idle in the plane-building process, just mostly. Earlier this month, I stabilized my 12' long work table with 2x6 legs, and then sawed it into two 6' long tables. Now it's "modular", as the kids say.
I also played a few games of darts - I have a dartboard in the shop. A "game" of darts for me goes like this: throw both sets of three darts randomly at the dart board, missing the board on at least one throw; gather darts from the board, wall, floor; rinse; repeat. I've streamlined the process by eliminating the "rinse" step.
I also learned some stuff: Maybe splurge a little on your drill press, if you're going to splurge on any power tools; Metal files are wonderful things; and I can be lazy (which I actually already knew).
Anyway, I still don't have anything that looks like a plane yet, but I'm back in the saddle. --Bill
Dad at the bending brake.
Mid-bend straightening technique (TM)

The day's results
Real, almost visible, progress - July 10, 2007
My Dad came over on July 10th and worked with me from 1:30 until 9pm, with a 1 hour break for delicious pizza at Carbone's. He started in on the .032 channel and angle stock.
I've got "recipes" for bending written on one of my work tables, so I can remember how to get the desired length of each side of a bend, and know how wide to cut the piece of flat sheet the stock is made from. Dad wisely made one short test piece of channel using my recipe, and we found that the sides were a smidge short, and the bottom of the channel was a smidge long. Part of the reason may be that the recipe was created for .025 channel, and the thickness difference made the recipe wrong for .032. Not sure.
Anyway, we reworked the recipe, and Dad tested it - the test piece came out perfect. He went ahead and finished all of the channel, then moved to the .032 angle and finished that.
He also came up with a way to lessen or eliminate the slight "sag" in the angle you tend to get in the middle of a long piece when bending on the brake. He took a piece of scrap .032 strip and, after starting the bend, placed it behind the middle of the piece being bent. This gave enough extra support to the middle of the piece to pretty much eliminate the sag, and make the angle uniform throughout the bend.
Right now I've got the plans open mainly to the Tail section, trying to get everything in that section fabricated so assembly can begin. On the 7th, I worked on miscellaneous pieces from that section, several of which required the channel that Dad was creating.
Along the way, the bandsaw blade broke. I didn't have a spare (this one *was* the spare when the last one broke), so I switched to mainly layout and hole-drilling mode.
All in all, we got a ton done. It's a lot easier to stick to building for several hours with a building partner in the shop with you (at least for me).
-Bill
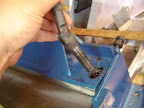
Threaded pins for the clamping plate had to come out to accommodate the rudder skin.

Nice angle
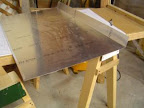
An elevator skin with two bends in it.
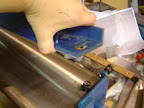
Control Surfaces - Elevator and Rudder skins - July 13, 2007
Dad came over on the 13th and cut all the angle pieces he had made on Tuesday to size. Straight aviation snips worked great for this, and there was no waste. He had marked out the lengths on the pieces before bending, so it was all ready for him when he started.
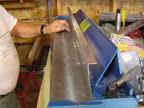
Then we decided to tackle the elevator and rudder skins. There are two elevator skins (one on each side of the rudder) and, of course, one rudder. They all have the same shape control surface, with three bends in the sheet. We figured we could do two of the bends in my 40" bending brake, which turned out to be true--barely. The rudder skin is just a hair shorter than the entire surface of the bending brake. We had to take out the threaded pins that lock down the clamping plate in order to get the clearance we needed for the rudder skin. To get the biggish bend radius the plans call for, we set back the clamping plate as far as it would go. Since we didn't have the threaded pins, we used a C-clamp and a vice-grippy thing to hold the plate in place. We used Dad's patented bending technique (see the "Tips and Tricks" section) to keep the bends straight.
The bends turned out very nice. We were able to get the full angle we needed on the brake. The elevator skin pieces are shorter, so we were able to use the threaded pins for clamping those pieces. Very satisfying to get a start on these pieces. Just one bend left.
--Bill
how how how how how how? - July 17, 2007
I'm trying to figure out how to do the third, "middle" bend in the elevator and rudder skins. How do I get that pretty radius around that tight corner like it shows in the plans with the tools I have on hand?
So I did some experimentation on scrap. I tried using a dowel. Didn't work too well. Tried putting a radius on the edge of a 1x2, not very happy with the result. Tricksy.
-Bill
The bending brake is hungry...

Pretty good radius.
Elevator skin with three bends.
Elevator Action! - July 20, 2007
Still trying to get my mind around how to do the "middle" bend for the elevator and rudder skins, I got out my "Scratch Building Basics for Metal Aircraft" DVD, and watched the section on rudder skins. To do their middle bend they just put the skin in the bending brake and then got the rest of the bend by carefully pressing it on the bench with a long piece of 2x4. Doggone it, I could do that!
I hustled into the garage and took one of the threaded pins out of the clamping plate (the skin--with two bends in it already--would be difficult, if not impossible to slip under the plate otherwise), put in one of the elevator skins and made the bend. Then I put the piece on the bench and used the 2x4 technique to approach the angle I needed. Now I have something that looks like it might belong on an airplane! This is exciting.
-Bill
One step back, two steps forward - July 23, 2007
Dad came over tonight and first off, we put the middle bend in the second elevator skin. Both elevator skins are looking very good. We then got out the rudder skin (which in our previous episode had had two bends put in it). We started to measure it for the bend,using the same measurement we were using for the elevator skins, since they're the same shape. That's when we discovered it was short by an inch. "Yarrrg!" said the pirate in me. We banished that piece to the Land of Future Wing Ribs, and went to cut out another skin.
So we cut out a new skin. As we were measuring it, Dad said, "Wow, this thing fits on a 40 inch brake?" Well, it did last time--we just had to take the pins out and use c-clamps so we could use the whole surface.
We finished cutting out the skin, then moved over to the brake after taking the pins out. Lo and behold, the skin did *not* fit on the brake. And *that's* when we discovered that our scrapped rudder skin had also been short in length. The correctly cut skin won't fit on the brake, so it will have to be bent somewhere else.
Not being able to continue with the Rudder skin, we moved on to fabricating the ribs for the elevators. Over the course of 2 hours, we laid out, cut out, and bent the flanges on 6 elevator ribs. All are identical, except that on three the flanges bend one way, and on the other three they bend the opposite way. They turned out very nice, and again, it's very exciting to have the elevators so far along. I better order some rivets this week.
--Bill
*Bangs head against table* ... *Regains conciousness* ... *Writes blog entry* - July 25, 2007
I'm not the most organized person in the world, but I try to be organized when I can, so tonight I decided to catch up on my expense log on this website. I went through my entire folder of receipts, entering each one as a separate expense entry, with a description, the date and how much was spent, and then the internet ate all my work. There's a tube somewhere with all that data stuck in it. The end.
-Bill
Addendum - Ordered Rivets and Piano hinge - July 25, 2007
I ordered enough rivets and piano hinge to complete the Tail.
-Bill
No comments:
Post a Comment